Matching Transformation in Maya and MFnTransform pitfalls

I used to rely a lot on the MFnTransform class solely to match the transformation of one object to another and it has worked great for me (until recently).

In my own rigging system and the ones I built for my employers I never freeze transformations. I usually create an offset/buffer group and never mess with the object's pivot. I also never have multiple rotation offsets on top of my nodes (which actually complicate the process of matching transformations of one object to another with the MfnTransform like explained below)

However, now that I am dealing with all kind of rigs from different sources I can't force my aesthetic on them and instead I have to find a way that can work around all kind of the above issues to be able to wrap them to my rigging system.

The translation methods of the MFnTransform work great in all cases, especially that you can get the rotatePivot point in worldspace directly which is beneficial if you are dealing with objects that have frozen transformations. However, it is very prone to fail with objects that have -1 scale or with frozen transformation. That is when I realised I will have to rely more on MTransformationMatrix to decompose my target node matrix to guarantee the correct rotation values that I need to apply to my object to match.

Here is the code (With Maya API 2) I use to match transformations now and tested with every case and so far worked great. I will also comment out the previous methods I used to match the rotations with the MFnTransform class and when did they fail for me in case anyone is interested in testing for themselves.

import maya.api.OpenMaya as OpenMaya
def getMDagPath(node):
    selList=OpenMaya.MSelectionList()
    selList.add(node)
    return selList.getDagPath(0)
    
def getMObject(node):
    selList=OpenMaya.MSelectionList()
    selList.add(node)
    return selList.getDependNode(0)

def matchTranformation(targetNode, followerNode, translation=True, rotation=True):
    followerMTransform=OpenMaya.MFnTransform(getMDagPath(followerNode))
    targetMTransform=OpenMaya.MFnTransform(getMDagPath(targetNode))
    targetMTMatrix=OpenMaya.MTransformationMatrix(OpenMaya.MMatrix(cmds.xform(targetNode, matrix=True, ws=1, q=True)))
    if translation:
        targetRotatePivot=OpenMaya.MVector(targetMTransform.rotatePivot(OpenMaya.MSpace.kWorld))
        followerMTransform.setTranslation(targetRotatePivot,OpenMaya.MSpace.kWorld)
    if rotation:
        #using the target matrix decomposition
        #Worked on all cases tested
        followerMTransform.setRotation(targetMTMatrix.rotation(True),OpenMaya.MSpace.kWorld)
        
        #Using the MFnTransform quaternion rotation in world space
        #Doesn't work when there is a -1 scale on the object itself
        #Doesn't work when the object has frozen transformations and there is a -1 scale on a parent group.
        #followerMTransform.setRotation(MFntMainNode.rotation(OpenMaya.MSpace.kWorld, asQuaternion=True),OpenMaya.MSpace.kWorld)

So as you can see in the code, I still use the MFnTransform to match the translation of my object to the target's rotate pivot. Then I use the MTransformationMatrix to decompose the world Matrix of the target node so I can get the correct rotation no matter what rotation order, negative scale and whatever offsets in the target's hierarchy.

PS:Using Maya API doesn't support UNDO. If you want to be able to undo the snapping consider using the API to decompose and store information and use the maya.cmds xform command to move the object instead.

Adding an Animated Gif to a QLabel with Pyside

Time for another tutorial  not for the drag and drop (Got a bit distracted with the inspiration for this tutorial) but for adding an animated gif to a QLabel.

In this example I am loading the file into a QByteArray so we don't keep that GIF in memory. However you can add the GIF file directly to the QMovie as the first argument.

If you can't display the GIF in your own code, double check the qt.conf file and make sure that it is referring to the correct plugins folder. 

PS: If you don't recognise the GIF shown in the tool, you can find the Video here.("You are welcome"). 

import sys
import os
from PySide import QtCore, QtGui
ImagesFolder=os.path.join(os.path.dirname(__file__),'images')

class CucumberGifWidget(QtGui.QLabel):
    def __init__(self, parent=None):
        super(CucumberGifWidget, self).__init__(parent)
        self.setAcceptDrops(True)
        self.setFrameStyle(QtGui.QFrame.WinPanel | QtGui.QFrame.Sunken)
        self.setAlignment(QtCore.Qt.AlignCenter)
        self.setSizePolicy(QtGui.QSizePolicy.MinimumExpanding, QtGui.QSizePolicy.MinimumExpanding)
        
        trashGif= open(os.path.join(ImagesFolder,'cucumber.gif'), 'rb').read()
        self.gifByteArray=QtCore.QByteArray(trashGif)
        self.gifBuffer=QtCore.QBuffer(self.gifByteArray)
        self.movie = QtGui.QMovie()
        self.movie.setFormat('GIF')
        self.movie.setDevice(self.gifBuffer)
        self.movie.setCacheMode(QtGui.QMovie.CacheAll)
        self.movie.setSpeed(100)
        self.setMovie(self.movie)
        self.movie.jumpToFrame(0)

    def dragEnterEvent(self, event):
        if event.mimeData().hasImage():
            event.setDropAction(QtCore.Qt.MoveAction)
            event.accept()
        else:
            event.ignore()

    def dropEvent(self, event):
        event.setDropAction(QtCore.Qt.MoveAction)
        if event.mimeData().hasImage():
            if "cucumber" in event.mimeData().text():
                self.movie.start()
                event.source().setParent(None)
                event.source().deleteLater()
            else:
                event.accept()
        else:
            event.ignore()

Drag and drop with Qt and PySide

I have always been using (well at least the past 7 years) QT for creating interfaces for my PySide/PyQt applications. Lately I've decided to dive a bit deeper to create and experiment with more complex behaviours. 

Starting with a convenient behaviour : Drag and Drop.

In the example I am sharing here I re-implemented the drag and drop related methods of a QLabel and a QWidget so we are able to drag the label into the widget. What actually happens is that when we drop the label on  the widget we create another Label with the same information,  it is a Copying action.

TODO: In the upcoming weeks we will add the functionality of re-arranging the labels in the Drop widget and also from one Drop widget to another.
import sys
from PySide import QtCore, QtGui

class InitialCard(QtGui.QLabel):
    def __init__(self, text, parent):
        super(InitialCard, self).__init__(text, parent)
        self.setAutoFillBackground(True)
        self.setFrameStyle(QtGui.QFrame.WinPanel|QtGui.QFrame.Sunken)
        newFont = QtGui.QFont("MsReferenceSansSerif", 10)
        newFont.setBold(False)
        self.setFont(newFont)
        self.setMinimumSize(90, 25)
        self.setMaximumHeight(30)
        self.setAlignment(QtCore.Qt.AlignCenter)
        self.mimeText=self.text()

    def mouseMoveEvent(self, event):
        if not self.text():
            return
        mimeData = QtCore.QMimeData()
        mimeData.setText(self.mimeText)
        drag = QtGui.QDrag(self)
        drag.setMimeData(mimeData)
        drag.exec_(QtCore.Qt.CopyAction | QtCore.Qt.MoveAction, QtCore.Qt.CopyAction)

class CardsDropWidget(QtGui.QWidget):

    def __init__(self, parent):
        super(CardsDropWidget, self).__init__(parent)
        self.setAcceptDrops(True)
        self.contentsVLO = QtGui.QVBoxLayout()
        self.contentsVLO.setAlignment(QtCore.Qt.AlignTop)
        self.setLayout(self.contentsVLO)
    
    def dragEnterEvent(self, event):
        if event.mimeData().hasText():
            event.setDropAction(QtCore.Qt.CopyAction)
            event.accept()
        else:
            event.ignore()

    def dropEvent(self, event):
        if event.mimeData().hasText():
            cardSource=event.source()
            cardText=cardSource.text()
            if not cardSource in self.children():
                newCard = InitialCard(cardText, self)
                self.contentsVLO.addWidget(newCard)
                cardSource.clear()
            else:
                event.ignore()
        else:
            event.ignore()

class MainDialogue(QtGui.QDialog):
    def __init__(self, parent=None):
        super(MainDialogue, self).__init__(parent)
        self.label=InitialCard("initial", self)
        self.lineEdit=QtGui.QLineEdit("Create a Card Here!!")
        self.lineEdit.selectAll()
        self.scrollArea = QtGui.QScrollArea()
        self.scrollArea.setWidgetResizable(True)
        self.scrollContent = CardsDropWidget(self.scrollArea)
        self.scrollArea.setMinimumWidth(150)
        self.scrollArea.setWidget(self.scrollContent)
        self.dialogueLayout=QtGui.QHBoxLayout()
        self.labelLayout=QtGui.QVBoxLayout()
        self.labelLayout.addWidget(self.label)
        self.labelLayout.addWidget(self.lineEdit)
        self.labelLayout.addStretch()
        self.dialogueLayout.addWidget(self.scrollArea)
        self.dialogueLayout.addLayout(self.labelLayout)
        self.setLayout(self.dialogueLayout)
        self.setWindowTitle("Drag and Drop")
        self.setMinimumSize(300, 150)
        self.lineEdit.returnPressed.connect(self.createCardTxt_fn)
        
    def createCardTxt_fn(self):
        cardTxt=unicode(self.lineEdit.text())
        self.label.setText(cardTxt)

if __name__ == '__main__':
    app = QtGui.QApplication(sys.argv)
    window = MainDialogue()
    window.show()
    sys.exit(app.exec_())

Ik Spline Advanced Twist Controls - Tutorial

Hello everyone,

I thought I would share some info on the Ik Spline Advanced Twist Controls since I found a few questions about it online and also our new riggers were kind of confused about it 

There are many ways to setup the twist along a spline IK joint chain.. Based on the character you are rigging you can choose what is best for you.

This tutorial assumes you are already familiar with the spline Ik setup and will be focusing only on the advanced twist settings.

First of all, if your aim axis along the joint chain...


Read More

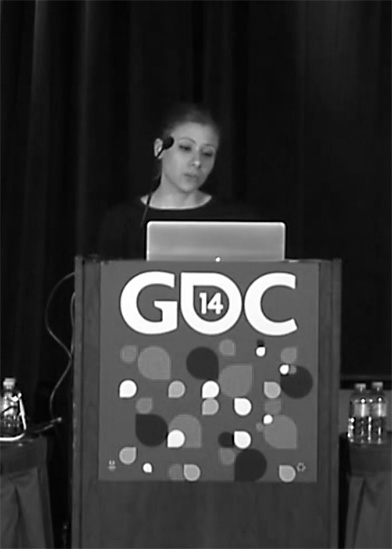
GDC 2014: Technical Artist Bootcamp

I’ll be giving a presentation at GDC2014 together with the awesome Vlad Mastilovic from 3lateral. You can DOWNLOAD IT HERE
He’ll be talking about the Ryse facial rigs and I’ll be talking about the character rigging on Ryse.

Technical art continues to march forward and at a faster pace than most disciplines, as it is wide-reaching and wide open. Rigging, Python, pipelines, shaders and unit tests are all known and understood at this time. It’s time to push forward and stretch our legs. Large studios need more powerful toolchains with more professional development environments and small teams need each and every member to be very technically capable. Technical artists know efficiency is at a premium, and a working tool is not good enough anymore; tech artists will learn to focus on a quality user experience when designing tools and workflows. Tech animators will learn quick prototyping techniques of animation systems, which has traditionally been one of the most complex areas to author. More techniques for automating asset processing, fast cinematic workflows, and optimizing asset performance for run-time will be covered.
— GDC